
Publishing and sharing forms
Publish Mokaform forms, customize share links, embed on websites, generate QR codes, download PDFs, and set social previews.
Maintained by the Mokaform Product & Documentation team · Last updated
Your form is ready. Now let's get it to the people who need to fill it out.
What you'll learn
- How to make your form live
- All share options: link, customized link, QR code, web embed, email embed, PDF, template, and social preview
- How to fix common problems
1. Make your form live
When you haven’t published your form yet, or after you’ve updated it, publish it to push your changes live.
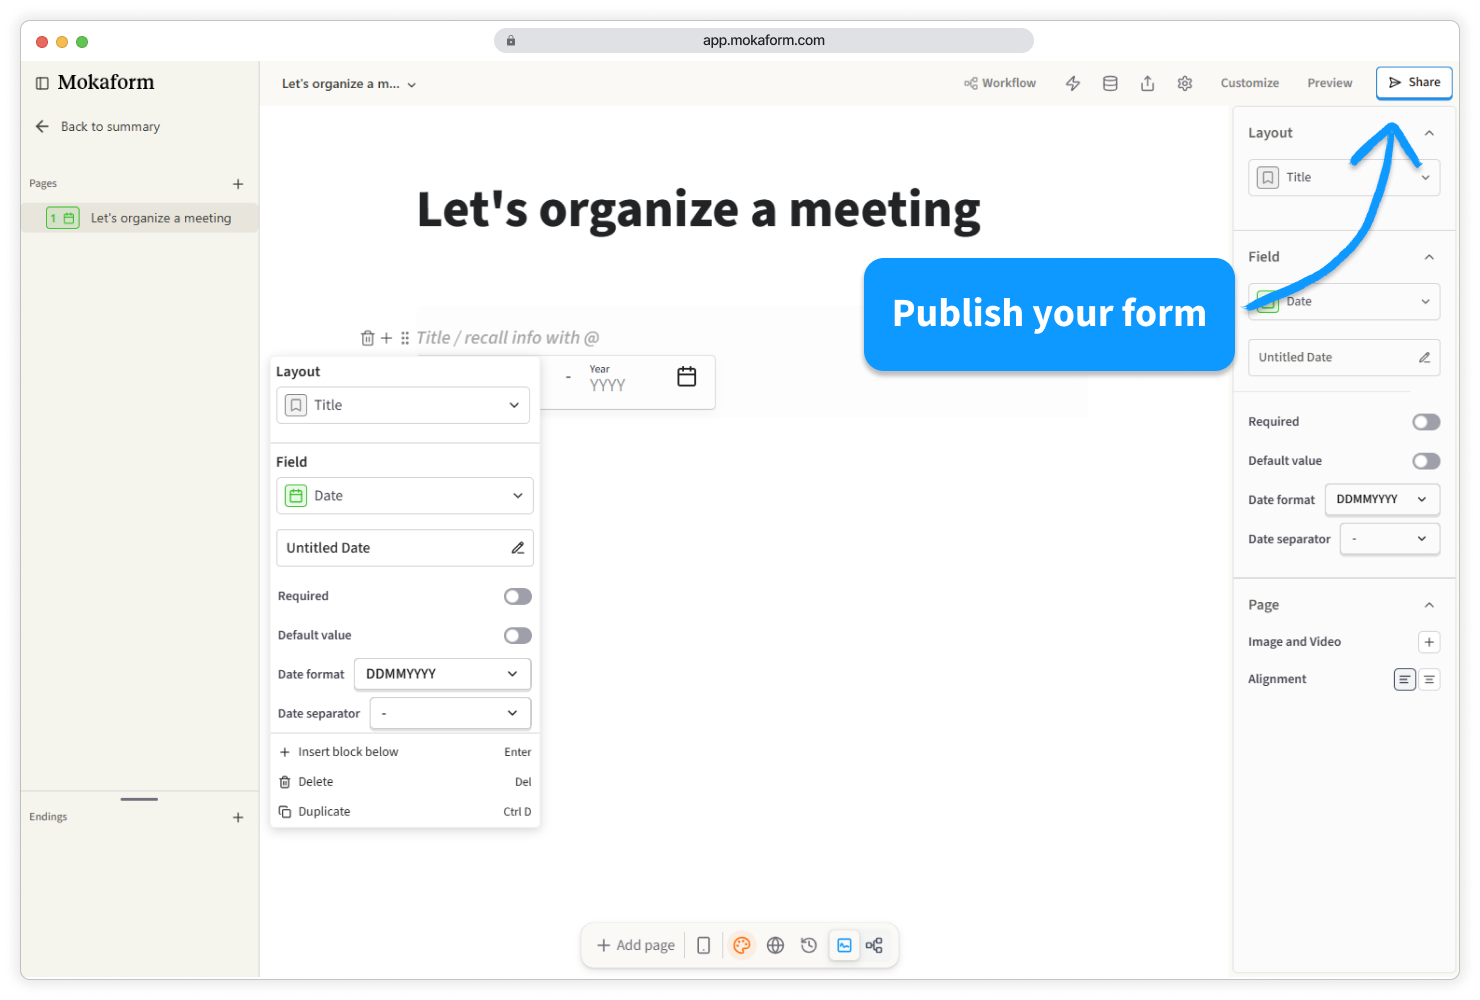
Navigate to the edit section.
Publish your form with the button at the top right.
Done. Your form is live and has a permanent link.
2. Share your form
In the Share tab, pick the method that fits your situation.
Share a link
Best for: emails, messages, social posts
Stay on the Share tab.
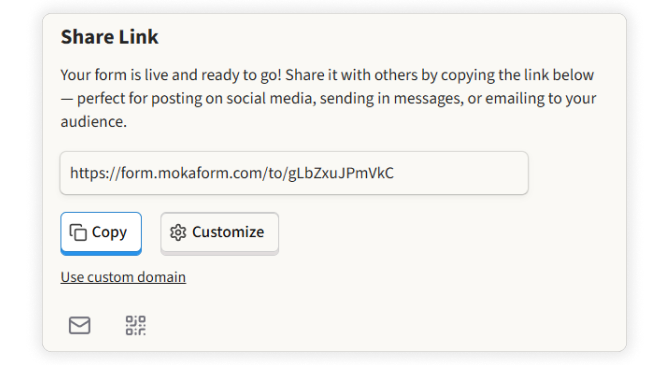
Click Copy next to the link.
Paste it in your email, message, or post.
Customize the link
Best for: branded campaigns, printed QR codes, and links that should be easy to read
Use the customized link option when you want to change the form path or use a verified organization domain.
PRO feature
Custom paths and custom domains are available on PRO.
Open the Share tab and find the link section.
Choose the domain or subdomain you want to use.
Enter a short path, such as customer-feedback, contact, or event-registration.
Save the custom URL, then copy and test it in an incognito window.
If the link has already been sent, printed, or embedded, changing the domain or path means you also need to update those places.
Embed on your website
Best for: contact pages, blog posts, landing pages
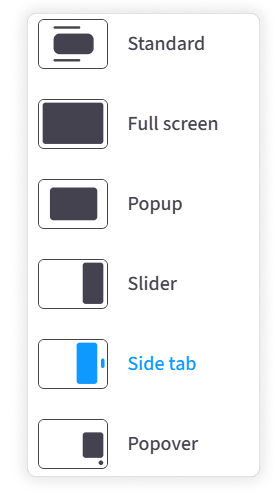
| Style | Description | Best For |
|---|---|---|
| Standard | Form appears inline | Contact pages |
| Full screen | Takes over screen | Focused surveys |
| Popup | Button opens modal | Landing pages |
| Slider | Slides in from side | Exit intent |
| Side tab | Tab on edge of screen | Always available |
| Popover | Widget in corner | Chat-style |
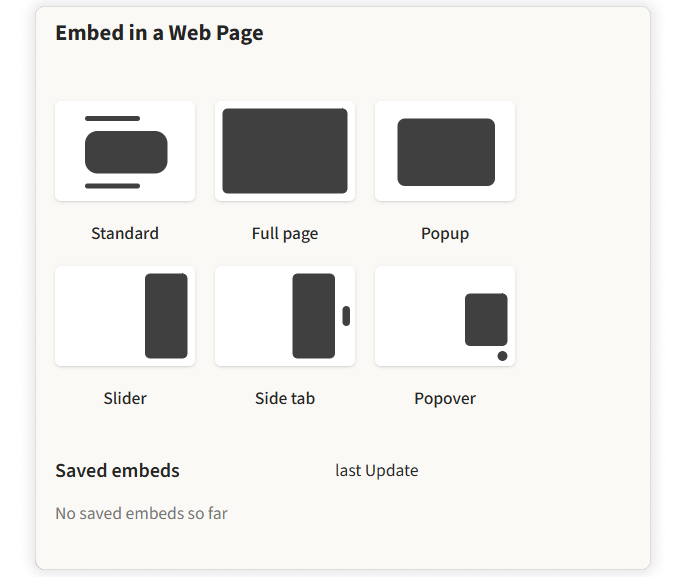
Scroll to "Embed in a Web Page".
Click your preferred style.
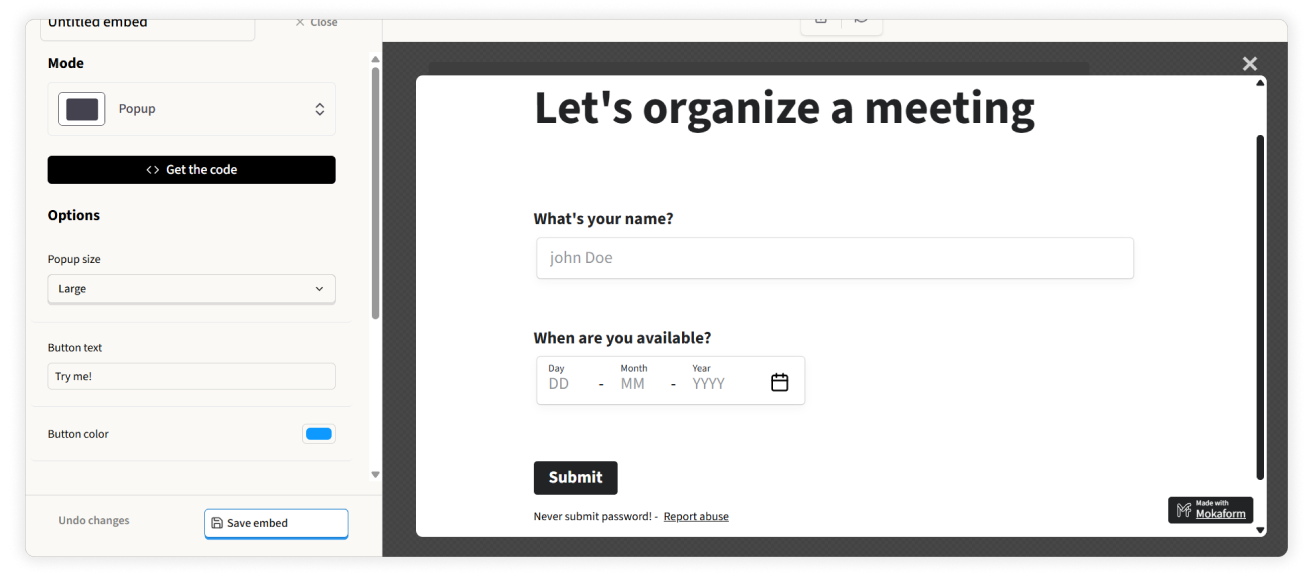
Customize button text, colors, and size.
Click Save embed, then Get the code.
Copy the HTML code and paste it in your website's HTML editor.
Using Notion, Ghost, or Canva?
Click Copy embed link instead, then paste that link directly in your editor.
The Standard style works with most website builders and has the fewest compatibility issues.
Embed in email
Best for: email marketing campaigns (Mailchimp, HubSpot)
Click See instructions in "Embed in an email".
Check if your form works with email. If you see a yellow warning, remove unsupported fields.
Click Copy to get the email code.
Open your email marketing tool and switch to code view (<> icon).
Paste the code.
Unsupported fields: Date, File upload, Signature, Payment. This only works with email marketing tools, not Gmail or Outlook.
Generate a QR code
Best for: posters, business cards, events, physical locations
Click the QR code icon (next to the email icon).
Download the QR code.
Print it on your materials.
When to use: conference booth, restaurant feedback, event signup, poster campaigns.
Download as PDF
Best for: offline review, printable forms, approvals, and records
The Share tab can generate a blank PDF version of the form.
Open the Share tab.
Find the PDF option.
Click Download.
Use the PDF as a blank copy of the questionnaire. To download a completed response as PDF, use the Submissions tab instead.
Customize social media preview
Best for: Facebook, LinkedIn, Twitter, WhatsApp shares
PRO feature
Saving custom social preview metadata is available on PRO.
Look at the Preview section on the right and click Customize.
Upload an icon (512×512px recommended) and a preview image (1200×630px recommended).
Edit the title and description, then click Save preview.
Now when someone shares your link, it shows your custom image and text.
Share as a template
Best for: sharing form designs with your team
Scroll to the "Template" section and click Create.
Fill in the template name, category, and privacy, then upload a preview image.
Click Create, then Copy link to share.
People who click can copy your form to their workspace.
3. Troubleshooting
Best practices
Timing
- Business surveys: Tuesday–Thursday, 10am–3pm
- Consumer surveys: evenings (7–9pm) or weekends
- Avoid: Monday mornings and Friday afternoons
Your message
- Tell them how long: "2-minute survey"
- Explain why: "Your feedback shapes our next update"
- Make it easy: put the link prominently
- Say thank you
Follow up
- Wait a week before sending a reminder
- Change your message for the reminder
- Don't send more than two reminders